
XAMPP is a web server solution stack package that helps us build a development environment in minutes. However, you might encounter an Error 404 when trying to access your website.
Accesss Forbidden
The Access Forbidden error, also known as HTTP 403, is a standard HTTP status code that is communicated from a web server to a client (such as a web browser) to indicate that access to the requested resource is denied or forbidden.
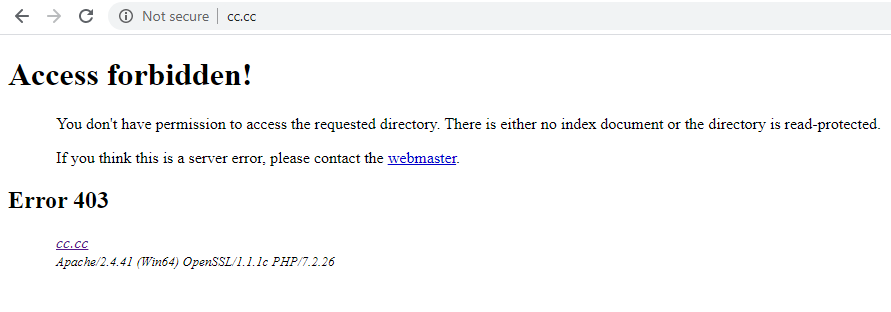
This occurs because the web server denies all requests by default. To resolve this issue, we need to make a small modification to the configuration file.
Steps to Solve this Problem
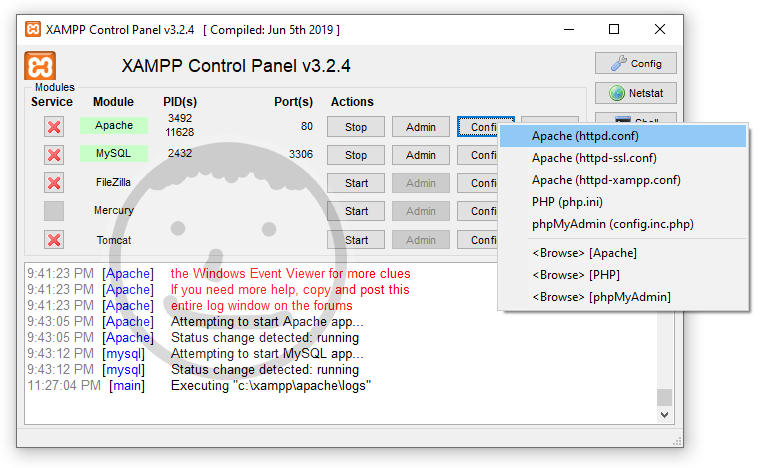
Step 1. Open httpd.conf
Open the configuration file named httpd.conf.
Step 2. Find the Appropriate Code
Next, locate the code section that looks like the following text:
#
# Deny access to the entirety of your server's filesystem. You must
# explicitly permit access to web content directories in other
# <Directory> blocks below.
#
<Directory />
    AllowOverride none
    Require all denied
</Directory>
Step 3. Modify the Code
Comment out AllowOverride none and Require all denied, then add the following code:
Options Indexes FollowSymLinks Includes ExecCGI
AllowOverride All
Order deny,allow
Deny from all
Allow from 127.0.0.1
Save the changes. The next step is to restart Apache for the changes to take effect.
Full example:
#
# Deny access to the entirety of your server's filesystem. You must
# explicitly permit access to web content directories in other
# <Directory> blocks below.
#
<Directory />
    # AllowOverride none
    # Require all denied

    Options Indexes FollowSymLinks Includes ExecCGI
    AllowOverride All
    Order deny,allow
    Deny from all
    Allow from 127.0.0.1
</Directory>
Step 4. Restart
Restart the Apache web server.
Conclusion
In this guide, we explored how to address the Error 404 issue that can be encountered when using XAMPP. The resolution involved making modifications to the httpd.conf configuration file to allow access to the server. The steps were:
- Opening the httpd.conf configuration file.
Locating the appropriate code section that handles access permissions. - Modifying the code to allow access from your local machine.
- Restarting the Apache web server to apply the changes.
It's important to remember that configuring a web server involves several security considerations. The modifications made in this guide are primarily for a development environment and may not be suitable for production use. When setting up a live server, it is essential to pay close attention to security best practices to protect your data and applications.
If you encounter any issues or need further clarification on any of the steps, don't hesitate to consult the XAMPP documentation or seek advice from the community forums.
Posts you may like:
 Install The latest version of PHP (7.2.9) on Ubuntu 16.04 Xenial
 Build Your Private Markdown Note by Vagrant + Docker + HackMd in Just A Few Minutes
 Hide Google reCAPTCHA V3 Badge Without Breaking The Rules
 Force Git to Use LF instead of CR+LF on Windows
 ElasticSearch – Service Start Operation Timed Out
 Solutions to “vagrant up” Hangs at “ssh auth method: private key”
 Linux Command SED, Tutorial with Examples to Relpace String
 Disable Chrome Autofill and Autocomplete
Comments
Your markdown plugin for wordpress looks great. Only 10 reviews it must be underrated. Lots of people use Ghost just for the live preview and simplicity of markdown syntax but everyone would rather use WP if it had the same thing. Ghost is a nightmare as even the DB structure is not supported in new versions, and older versions of Nodejs are needed just to run an older version of Ghost. This can be a nightmare and time waster even for a developer.
The markdown theme has been super awesome with amazing features. – Thanks