Make a Game with AI: Claude's 3-Day Three.js Soulslike & Dream Loop
How to make a game with AI: Meng To built a soulslike Three.js game with Claude in 3 days. His 6 steps and the Dream Loop, tested on my moon base.
When you make a game with AI, getting it to be "playable" isn't hard anymore. The hard part is making it "look good." You ask the AI to improve the lighting or make the effects flashier, and it tells you it's done every single time, but you can't tell whether it actually got better, or what's even different.
Meng To, founder of Design+Code and Aura, recently shared a soulslike Three.js game on X. He built it with Claude Fable 5.2 in three days. It runs in the browser, has full lighting, effects, and sound, and doesn't even have a build step. He walks through the whole workflow in a thread (original thread) and has open-sourced the skills he used on GitHub, but his full prompts aren't public. In this post, I break down his six steps, focusing on the trick that keeps the visuals improving, the Dream Loop, and at the end I try it myself on the moon base from my site's homepage.
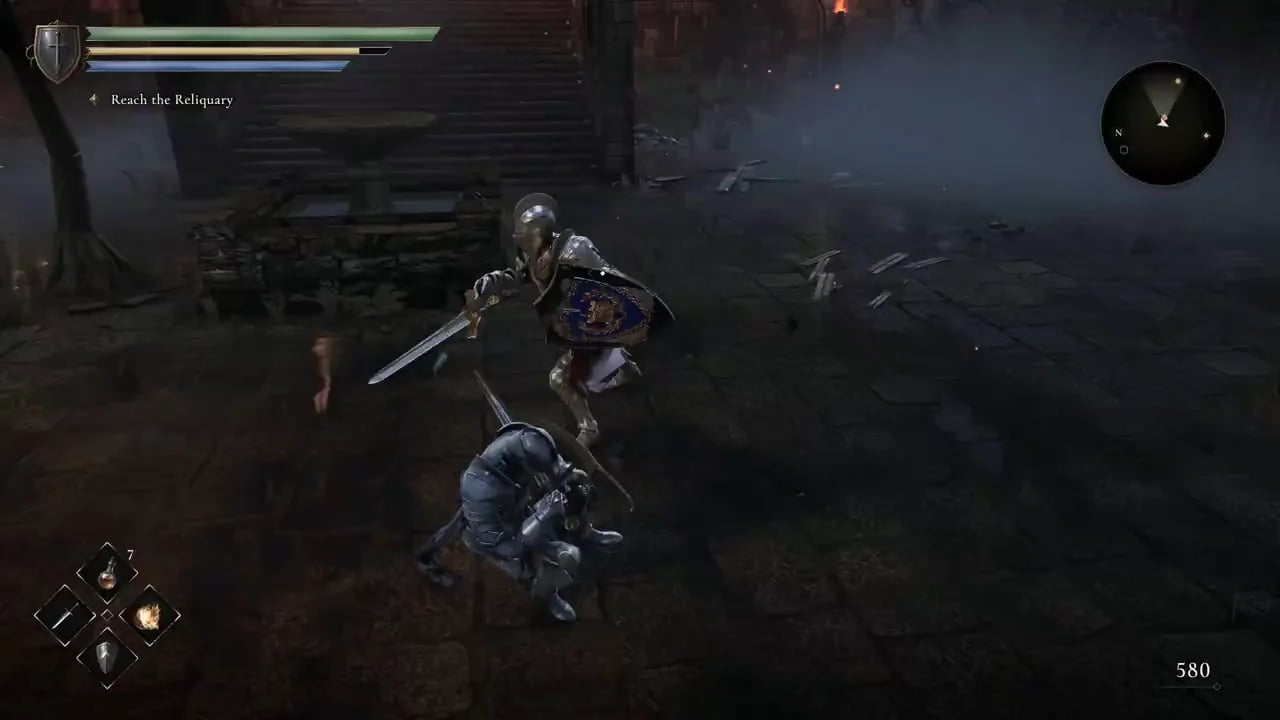
What tools did this game use?
His stack is just four things:
- Claude Code: Fable 5.2 as the main model, with Opus 5.5 running subtasks.
- Three.js: pure web 3D, no bundling or build step, runs straight in the browser.
- Seedream 5.0 Pro: AI image generation for character concept art, UI icons, and, most importantly, the "target images."
- Tripo 3D: turns concept art into 3D models.
None of these tools are unusual on their own. What's worth learning is how he chained them into a loop that keeps improving itself.
Step 1: Make the game playable first
The first step has one goal: get a playable version. He gave Fable 5.2 a prompt and had it load three skills: the open-source dream-loop, plus two of his own, one for a "score against a target" workflow and one for action combat design (both in his Skills repo).
Six hours and twelve prompts later, he had a level you could walk around and fight in, plus a boss. At this point, how it looks doesn't matter yet. The goal is to get the gameplay working end to end.
Step 2: Split the work across multiple Claude Code agents
Once it was playable, he made Fable 5.2 the lead and had it spin up several Opus 5.5 sub-threads, each owning one area: lighting, effects, characters, props, UI, and audio. Up to nine ran at once, and each one only edited the files it owned.
That last rule matters. When several AIs edit the same project at once, the most common failure is them overwriting each other. With each one sticking to its own files, all nine can actually run in parallel.
Audio was the exception. He said in the replies that AI is still bad at synthesizing sound effects in code, so he used his own sound library instead, wired in with the earshot skill.
Step 3: How do you turn AI concept art into 3D game models?
The pipeline for characters and monsters goes like this:
- Seedream draws the concept art, with strict requirements: a standard A-pose and a gray background.
- Tripo 3D turns the concept art into GLB models. The game uses 29 of them.
- The models come out without a skeleton, so the rig and animations were written directly in code by the AI.
The A-pose and gray background make image-to-3D easier: arms held away from the body don't fuse into one lump, and a clean background keeps shadows from getting baked into the texture. I ran into the same problems in my AI 3D modeling test and in checking Tripo AI models. If the concept art isn't prepared properly, everything after it is painful to fix.
He says every prompt and asset lives on a single Fil canvas, so you can see at a glance which concept became which model. But he only posted a screenshot of that canvas in the thread; the canvas itself isn't public, so you can't read his full prompts.
Step 4: What is the Dream Loop?
This is the smartest part of the whole process.
- Take a screenshot of the game.
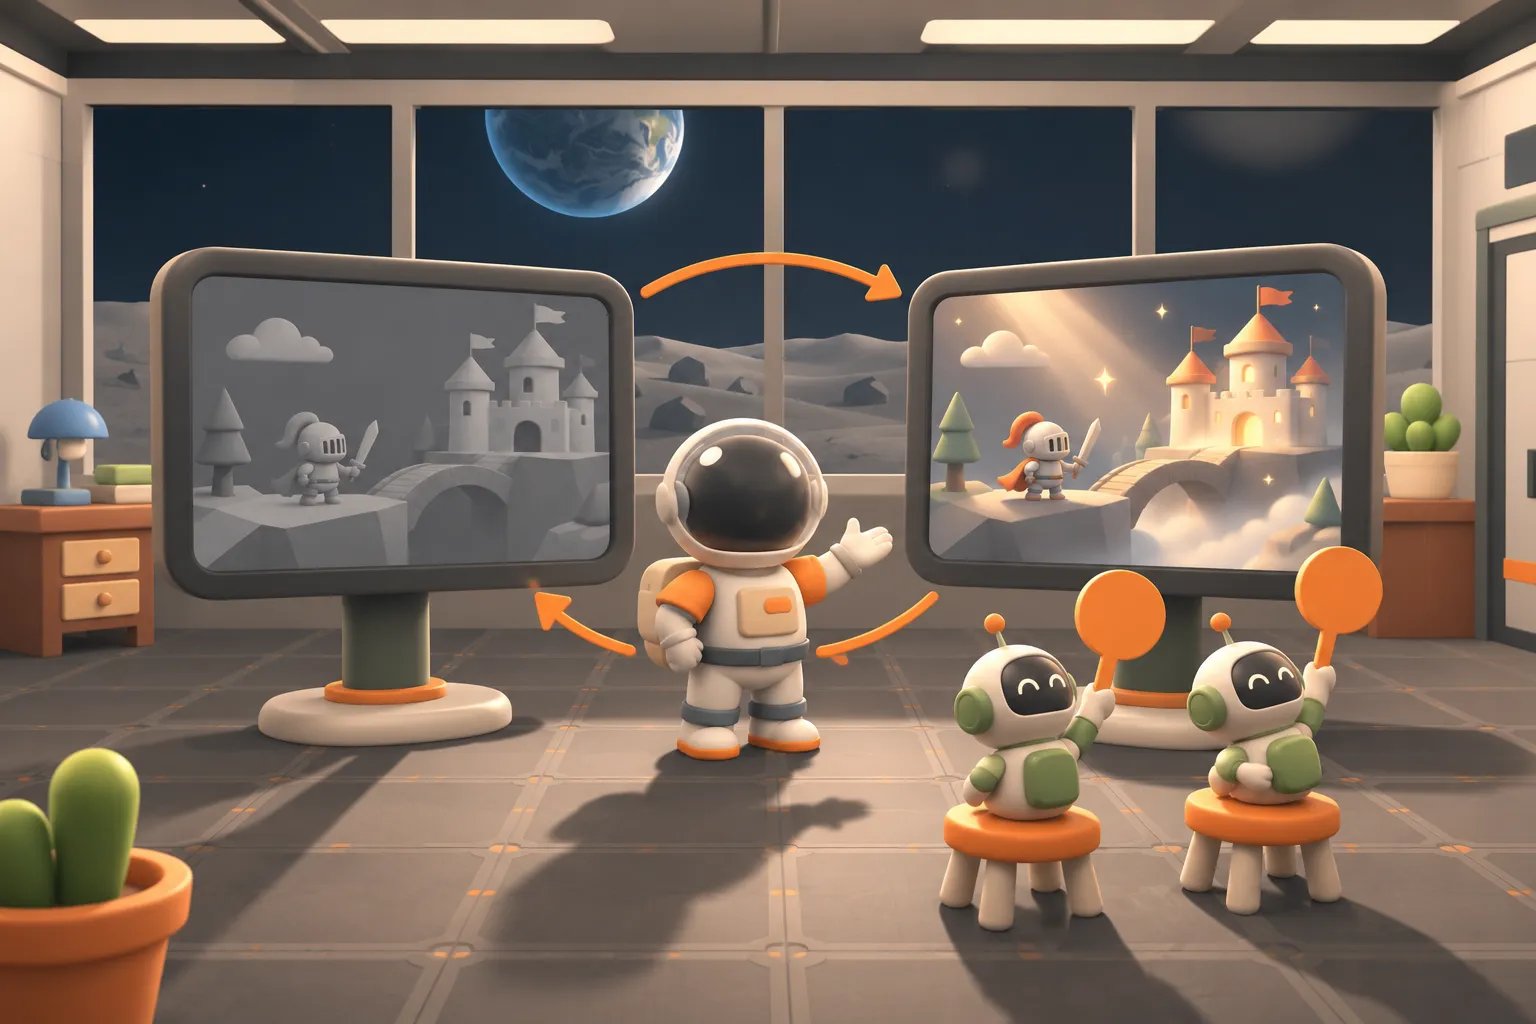
- Ask Seedream to redraw that screenshot. The prompt requires the camera, composition, layout, and character poses to stay exactly the same, and asks only for it to look better.
- That redraw becomes the "target image." The AI agents then work on lighting, materials, and effects until the game looks close to it.
Why does this work? Because "make it look a bit better" is something you can't sign off on, while a target image from the same camera angle can be compared directly: are the shadows in the corners deep enough, is light coming in through the window, does the floor have reflections? You can see all of it. And the AI finally has something concrete to chase.
For the rocks, clay pots, and stone in the scenes, he used free CC0 scanned assets from Poly Haven. Not everything has to be AI-generated.
My test: trying the Dream Loop on my moon base
I tried it on the moon studio from my site's homepage. It's a Three.js scene with the main character, Terry, standing in the middle of the studio and the lunar surface outside the window.
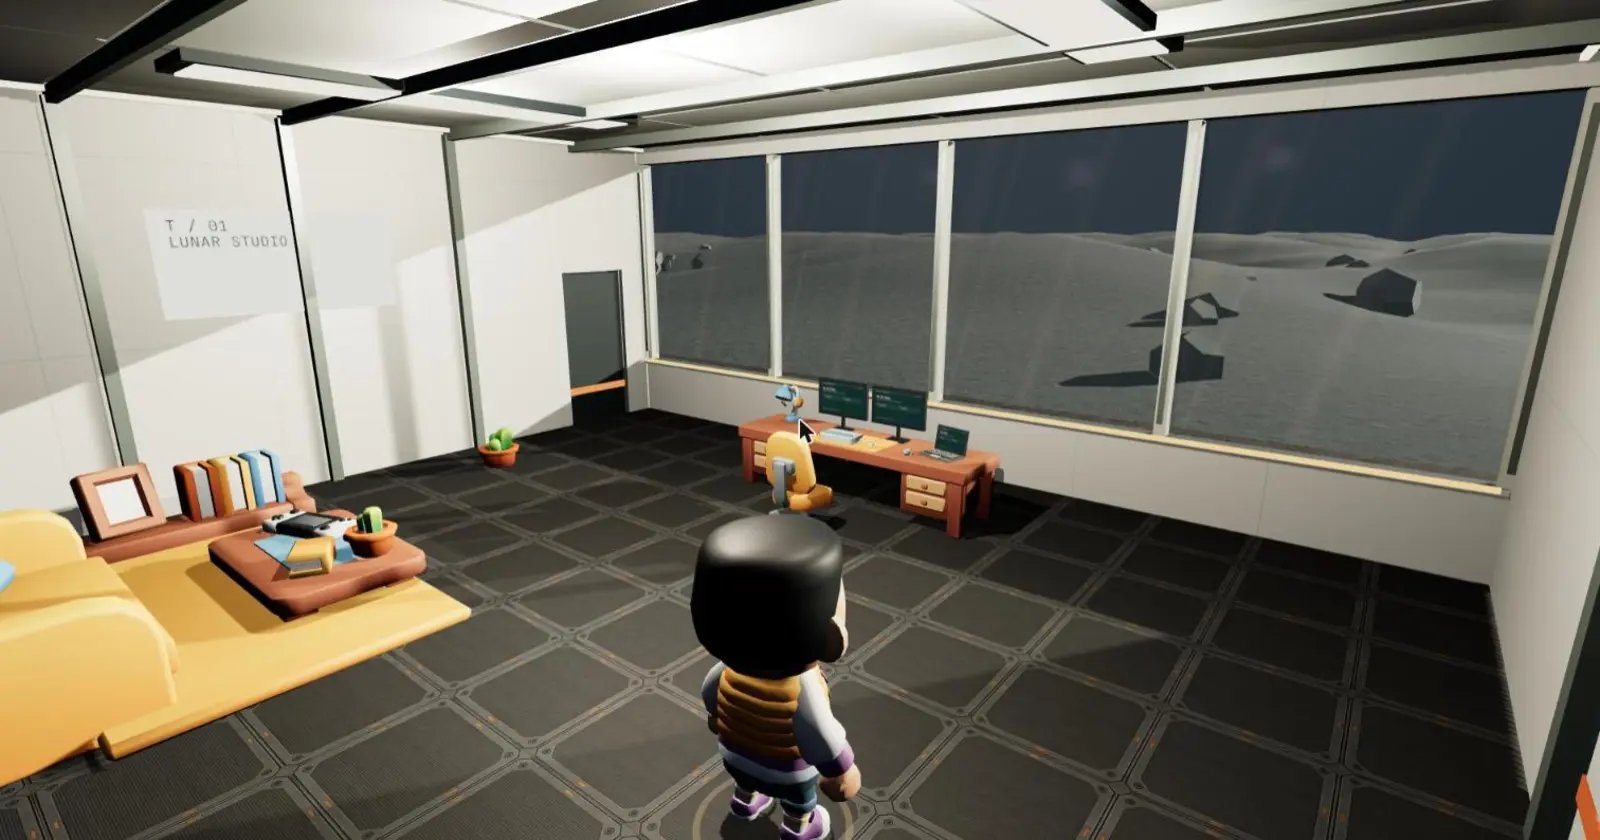
I redrew the screenshot with ChatGPT's image generation (gpt-image). The prompt followed the same idea as Meng To's and had two parts:
- Keep exactly the same: camera position, viewing angle, composition, the position and number of every object, the character's pose and chibi style, the room layout, and the color palette. I specifically said not to make it photorealistic.
- Change only the rendering: add ambient occlusion in the corners and under the furniture, warm light indoors with cool moonlight slanting in through the window, a faint glow on the screens, a slight sheen on the floor tiles, clearer craters on the lunar surface outside, stars in the sky, and a touch of bloom and vignette.
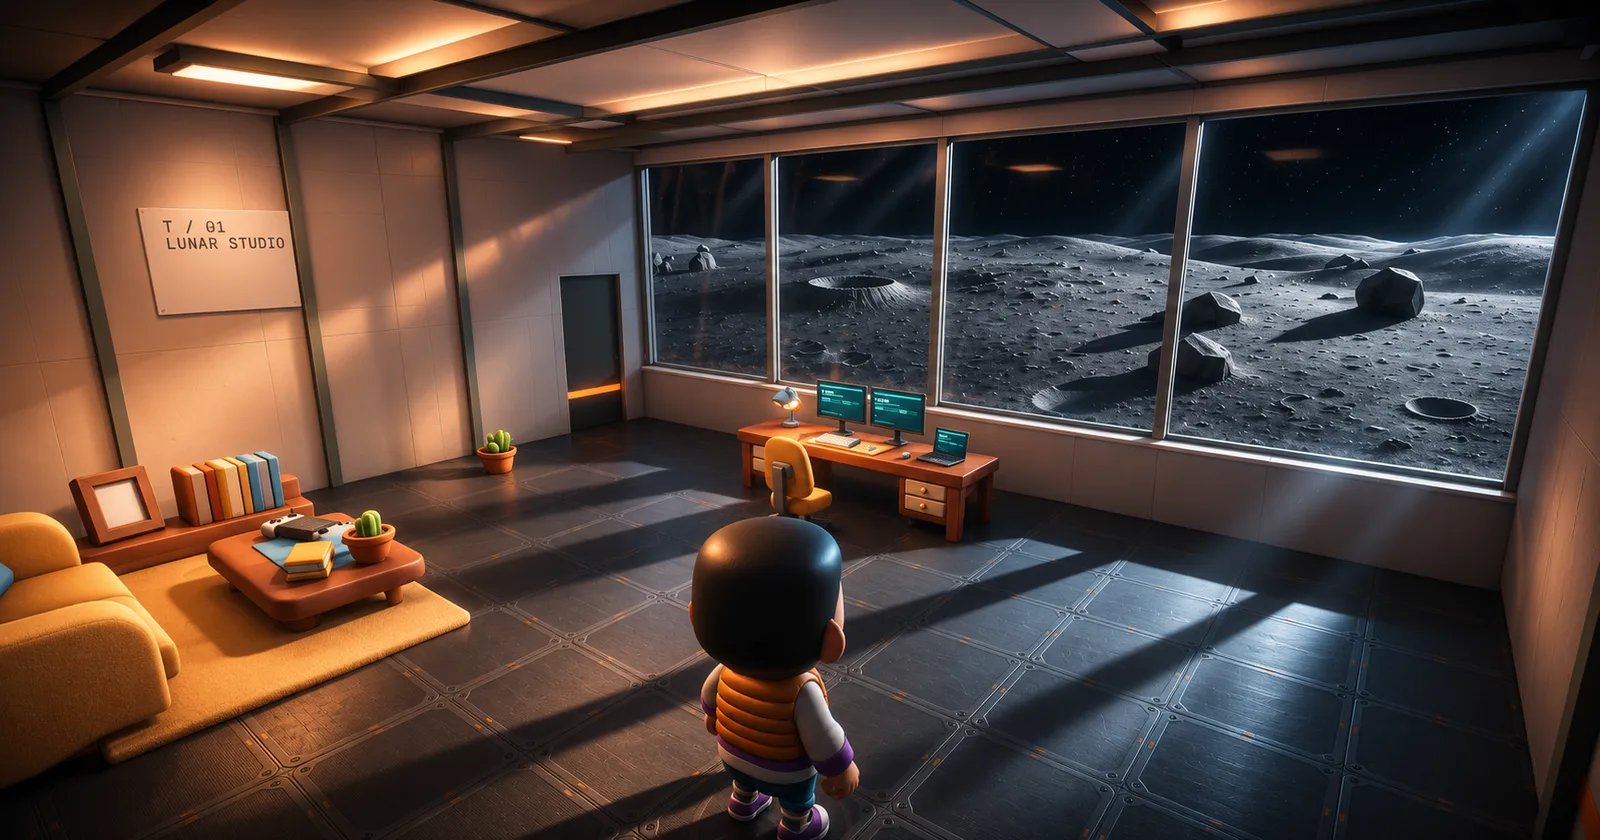
The direction was clear on the first try: the corners got shadows, light from the window cast bands across the floor, and the lunar surface went from a flat gray to terrain with craters and rocks. These are all things I can tell the AI directly: "make it look like this."
But the problems were clear too: the camera got pulled a little wider, and the desk got smaller. I explicitly wrote that the camera shouldn't move, and the image model still quietly changed the composition. Before using an image like this as a target, you have to check that it didn't change anything it shouldn't have. That's also why the judging in a later step matters so much.
Seedream vs. gpt-image: what's the difference?
Meng To uses Seedream for target images, and my first try used gpt-image. To compare them properly, I took a fresh screenshot and gave the same screenshot and the same prompt to Seedream 5.5 and gpt-image, one run each. Meng To used Seedream 5.0 Pro; I used the newer 5.5, which was cheaper in my tests and already accurate enough to line up pixel for pixel. What I cared about wasn't which one looked prettier, but which one held the composition better, because that's exactly what the Dream Loop needs.
This prompt was much stricter than the first one: it said explicitly that the composition had to align pixel for pixel, that no object or edge could move, and that it could only add effects Three.js can do in real-time rendering, such as lights, shadows, materials, and bloom. Nothing a game engine can't actually do.

Both look much better than the original, but they have different personalities:
- Seedream 5.5 leans cool and realistic: the lunar surface is bright and sharp, the floor has reflections, and the whole thing looks like a real space station.
- gpt-image leans warm and atmospheric: the ceiling lights are warmer, the starfield is denser, and the window light draws clear bands across the floor.
The real difference only shows when you overlay each redraw on the original:
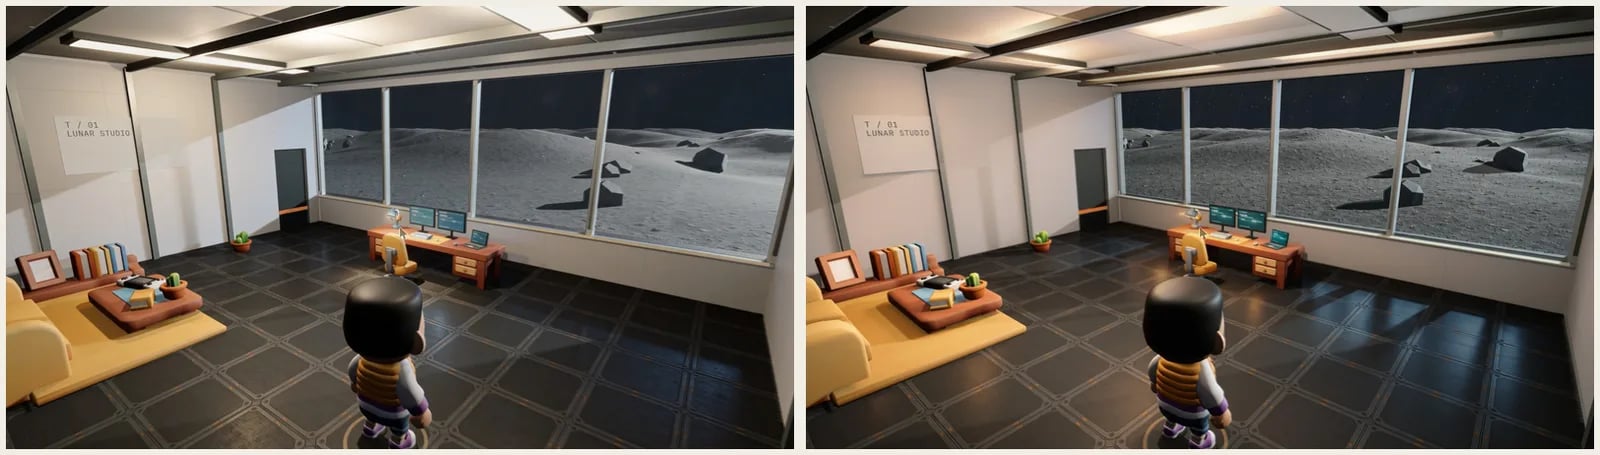
- Seedream 5.5 aligns almost pixel for pixel: there's barely any ghosting when overlaid. The window frame, desk, and character are all in place.
- gpt-image gets close but drifts a bit: the overall positions are right, but the edges of the ceiling and window frame are slightly misaligned. Even gpt-image itself reported after drawing that "the composition is close, but not pixel-aligned."
Seedream didn't get it right on the first try either. The first time, it output a square image, extending the scene up and down and recomposing the whole thing. I cropped the input to 16:9 and specified the output aspect ratio, and the second try lined up. So whichever one you use, settle the input and output aspect ratios first.
My conclusion: as a Dream Loop target image, Seedream is the better tool, because the AI agents are trying to match details in every position, and if the composition is a little off, all that chasing is wasted. gpt-image is good for exploring direction, to see "what feel this could have." Either way, always overlay the target image on the original screenshot once, and if they don't line up, redraw it.
Step 5: Let the AI design the UI too
He barely wrote any prompts for the game UI. Roughly:
- First, ask for concept art of the whole UI, including the health and stamina bars at the bottom of the screen.
- Ask it to build that.
- If it doesn't feel polished enough, ask for more gradients, irregularity, shadows, and noise on the borders.
- Finally, ask for the icons as transparent PNGs.
The icons are also transparent PNGs drawn by Seedream.
Step 6: Blind-test every change
This is the key that keeps the Dream Loop from going off the rails. His rules:
- For every change, capture 4K before-and-after screenshots from the same camera angle.
- Hand them to a brand-new AI judge, with the two images shuffled and labeled only X and Y, so the judge doesn't know which one is new.
- The change is kept only if the new version wins or ties.
- A full round uses two judges and a 10-point rubric, taking the lower score, with a target of 9.
AI agents are great at saying "I fixed it," but when they make the change and also sign off on it, things usually just drift further off. Bringing in a judge who hasn't seen the process and shuffling the order is basically regression testing for visual quality: changes that make things worse don't survive.
His own instructions were short too, roughly "keep going until it's an 8" and "give me before and after screenshots every time, and video for animations." At one point the boss's slash effect just wouldn't come out right, and his replies were clearly getting impatient. Even the best process still gets stuck sometimes.
The limits of this AI game development workflow
Meng To is upfront about it himself: this isn't a finished game yet.
- The video shows a scripted bot playing, and every scene was set up in advance.
- The strict judges mostly gave 5 to 6 points, still far from 9.
- Loading takes more than 10 seconds.
- Walk and run animations were the hardest. He said in the replies he tried at least 8 times, and rejected the walk 4 times.
So what three days produced is a playable demo, not a game ready to ship. But for a solo developer, getting from zero to this point in three days is already impressive.
Making a game with AI solo: which tricks should you learn first?
If you're also making games with AI, these are the three things I think are most worth taking home first:
- Define "looks good" with an image: screenshot, redraw, use it as the target. It's far more precise than writing a long style description.
- Let someone else sign off: take before and after screenshots from the same camera and have a fresh AI pick blind. Don't let whoever made the change grade it.
- One lead directing several specialist agents: each agent only touches its own files, so you can safely run them in parallel.
My next step is to rework the moon studio's lighting based on that target image from my test, taking before-and-after screenshots for the judge each time, and see if I can actually get close to it.
Have you tried letting AI judge whether the visuals got better? Come find me on Threads or X and leave a comment on one of my posts.